Livin' la Vida Roko

Wednesday, November 29, 2006

Easter Craft Roundup

I should have posted these months ago, but delays happen. Here are a couple pictures from Easter, 2006 showing an array of crafts and fun.

Paul using a syringe to fill plastic easter eggs with Jello Shots (i.e. vodka + jello) while Taryn is cooking a dish for easter.


Closer view:


Meanwhile, eggs are eagerly decorated by Justin, Rachel and Ken.


A shot of the whole kitchen doing easter crafts: Taryn is cooking, Justin/Rachel/Ken are decorating easter eggs, Kinley is searching for dropped food, while I am making a Chickham (see post below). What fun!

Tuesday, November 28, 2006

Making a Chickham

Although I'm sure somebody's probably made one before, I can't find any record of it online or in any of my cookbooks. So until I hear otherwise, I am christening you, oh deboned chicken stuffed with a ham that is then baked together in the oven, a Chickham. Plus, once you can make a Chickham, you can easily adapt the procedure to make the largest chicken cordon bleu ever! Oh, the endless possiblities...

Now without further adieu, here are the instructions for making your very own Chickham.

Before: Select a chicken (I used a ~4-5 lb fryer). Can be frozen, just dethaw before proceeding. Here's the chicken (breast side up) ready to be deboned:


Step 1: Turn the chicken upside down so the breast-side is facing the cutting board. Using a boning (or other small) knife, pierce the skin and cut as close to the bone as possible, keeping the blade facing the bone at all times. The goal of deboning the bird in this manner is to have one continuous piece of chicken with all skin still intact. Here is the bird cut on one side.


Step 2: Cut along the other side of the spine. When you get close to joining your cuts, the skin will be very thin (right under the midline between the two breasts). It is important not to pierce the skin -- keeping your knife facing the bone will minimize the chance of accidentally piercing. Once you cut all the way around the rib cage, you can pull it out. Here is just after the rib cage has been removed. Bird is still laying breast side down. Rib cage is on the right between the meat and knife.


Another view of the same step showing the bird, breast-side up.


Step 3: Now it's time for stuffing. Since I was cooking a ham anyway, I cut off a big chunk (see foreground). You can see the deboned chicken on the right.


Step 4: Place ham in the center of the chicken. Do your best to arrange it in a way that fits.


Step 5: Since a giant piece of ham doesn't normally fit inside a chicken, I held everything together with kitchen twine until it could be sewed together with a big needle and dental floss.


Step 6: With patience and tough fingers, use the threaded needle to sew up your Chickham.


All sewn up. It actually looks like it has bones, doesn't it?


Step 7: Cook the bird in a 300 degree oven until the chicken registers 165 degrees. Let it rest before slicing.


(Optional: If desired, you can also sew up the gaping whole in the side of the ham before baking. Here's the before:)


And the after:


Step 8: Slice that sucker up. Easiest carving job ever since there are no bones.


Step 9: Right before it goes onto the serving platter. Enjoy!

Monday, November 27, 2006

Unnecessary Project #1327

I got inspired by this site and have decided to try to make my own bacon. If folks could do it back in the 1600s without refrigeration or modern equipment, how hard can it be? According to the websites I've read, all you do is soak pork bellies in a sugar/salt solution for a couple days and then smoke them. Plus, I already have a deli slicer (thanks to Rachel's blind grandmother).

Turns out the hardest part so far was finding the pork bellies, which I got at Gartner's Meats yesterday along with some smoked dog bones for Kinley (happy puppy) and steaks for us (no more turkey, happy us). I bought 6 lbs of pork bellies (imagine what raw, unsliced bacon looks like). They only had them frozen -- apparently nobody buys pork bellies, even at a butcher shop. (Is this a sign?) I'm letting them thaw now in the fridge and will start the brine today or tomorrow. Brian is lending me his smoker since I don't have one of my own yet (hint, hint craigslist sellers that don't live in Hillsboro, Beaverton or Vancouver).

So far, the cost savings is not even worth it. Pork bellies cost $3.20/lb. And that's before the cost of the sugar/salt solution, the wood chips and my time (4 days intermittently + 1 smoking day). Especially since thick cut bacon is $2.50/lb, on sale. Hmmm. At least I'm saving money by making my own kahlua and infusing my own vanilla vodka, both started yesterday and are significantly cheaper than buying them in the store. Chalk up another use for toddy coffee.

Thanksgiving Times Two

I love Thanksgiving. We had 10 this year, including us. All family-less Slappers (our dodgeball team), the teacher of my dodgeball class and his girlfriend. We ate turkey, stuffing, corn casserole, roasted garlic mashed potatoes, tortilla soup, green beans, cranberry sauce and gravy. Yum. I even got to pair champagne with the soup and wine with dinner. Plus cosmopolitan champagne cocktails for appetizers. Very tasty and a nice change from mimosas. Since Brian gave me that 50 pound sack of walnuts, I tried to include them as much as possible. Marne made an awesome walnut pie, I added walnuts to the stuffing (eh, so-so), and infused some vodka. Note: walnuts make vodka smell even more like jet fuel. So instead of serving it straight, I made chocolate-walnut martinis for dessert. Walnut vodka and godiva liquor with a touch of cream, shaken over ice. Much tastier. Ken made two gorgeous pies, an apple and a pumpkin. We had a blast.

Turkeys were $4.50 at the store. Yes, for a whole 18.8 lb turkey. So I bought two and cooked the other on Sunday night for the football game. Same slapper crew for dinner. Used the dark meat for a thai turkey curry over rice and sliced up the breast for eating straight with gravy and a mashed potato dish that I read about in the Oregonian (mashed potatoes on bottom of a casserole dish, layered with sauteed mushrooms and carmelized onions, and topped with mashed potatoes again -- put under the broiler for crunch). Yum, but I am now officially sick of turkey. I am still happily eating stuffing and corn pudding, though.

It's Snowing

here today. Pretty cool albeit nothing is sticking. It still beats the rain though; we've had 11.61 inches of rain this month so far, beating the previous record of 11.42 set in 1942. Did I mention that I love my rain pants?

Monday, November 20, 2006

Dodgy Cooking: Chicken Pot Pie

The first cooking class was a blast. 4 attended out of the 6 and we made chicken pot pie. Why chicken pot pie? Because it teaches you the following basics:

1. How to brown meat
2. How to make a roux (and subsequent gravy)
3. How to make your own pie crust (takes 5 min and is cheaper than pre-made grocery store items)
4. How to use up the ingredients you have on hand rather than relying on recipes. (Especially good since thanksgiving is coming up.)

We drank lots of wine and I wrote up a manifesto on the subject so people could take the "how-to" home with them. Afterwards, we ate our spoils by candlelight and then went to a dodgeball party. Very fun. Can't wait to do it again.

For those who want to see a copy of the whole manifesto:

------------------------------------------

Dodgy Cooking
Class One: November 18, 2006


We’re making Chicken Pot Pie, one of the easiest and most versatile dishes. Fast to prepare, you can make it for one or fifteen with the same amount of preparation. Easily adaptable to whatever ingredients you have on hand.

Basic Principles: To make a pot pie, you need four things: the filling (meats and/or veggies), the gravy, the crust, and a vessel to cook it all in (i.e. you can make small individual ones or a giant one).

Deconstructing a recipe (we did not use this recipe, but it is an example of one broken down):


The Vessel:
First determine how many people you’re feeding and what you want to cook it in. I recommend individual bowls because it lets you dump all the ingredients in, cover it with gravy and a crust, and serve it straight from the oven without having to cut pieces, etc. Clean and simple. My mom always made a big 9” one. If you do a big one, you almost need two crusts to hold everything together. Two crusts mean an extra step. I am lazy.

The Filling:
Fillings can be anything. And any amounts. Just look on epicurious.com to see the massive list of options. Pick whatever suits your tastes. And don’t worry if it will work or not. It will; the basic principles of pot pies are all the same.
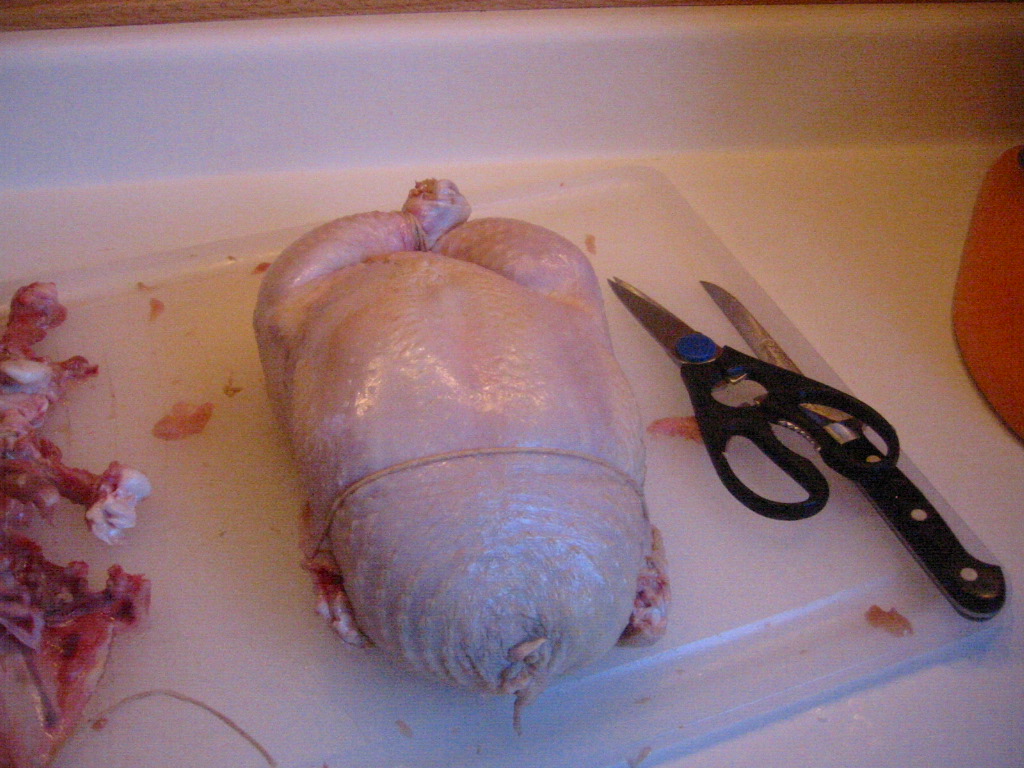
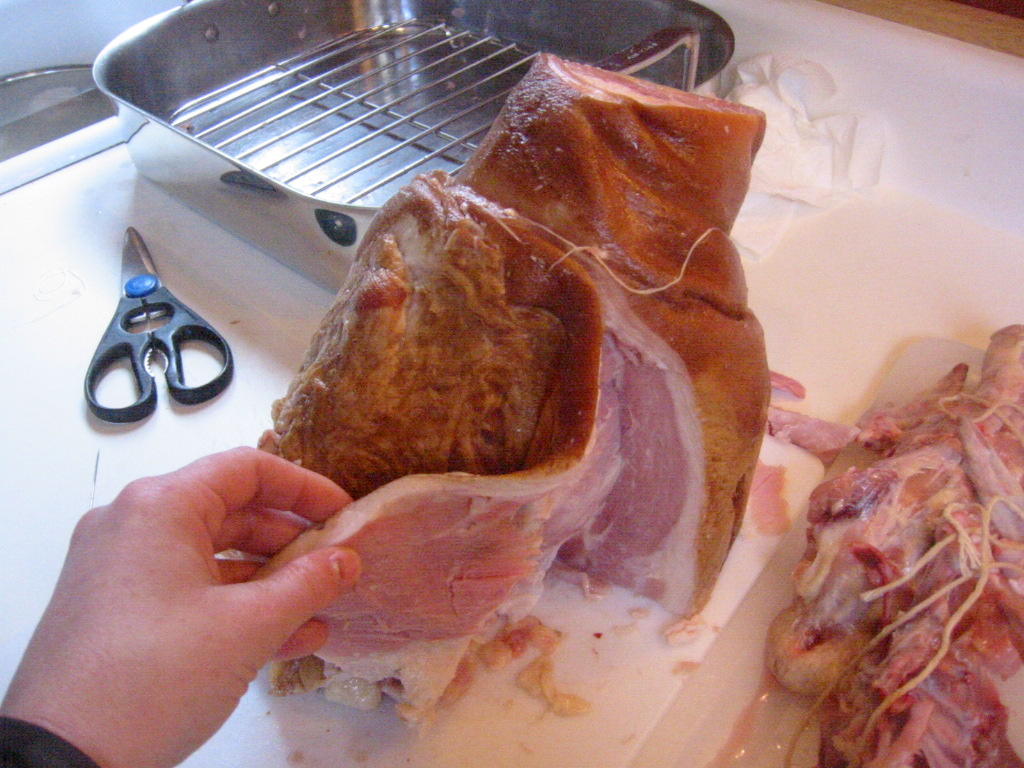
Meat Fillings: You can use any type of meat in your filling (i.e. chicken, turkey, pork, beef). I recommend browning it first because it tastes better. Use a heavy pan over medium high heat. Add salt and pepper and cook the whole breasts/thighs/loin/chop until it has a nice color. It does NOT need to be cooked all the way through. Remember, you’ll be cooking the whole thing at the end so the meat will finish that way. Once it’s the color I like (can be arbitrary and even burning in parts is fine – the beauty of gravy), I pull it out of the pan to cool. When cool, cut into pieces. (Alternative: you could cut it and then cook it, but then you have to watch it more. Like I said before, I am lazy). You can also skip the above if you’re using leftovers (i.e. thanksgiving turkey, that extra pork chop or chicken, ham, pastrami, etc. Just cut into pieces and use directly.)

Vegetable Fillings: Frozen mixed veggies is by far the easiest option since no chopping or measuring is needed. Other options include: onions, potatoes, squash, zucchini, apples, garlic (roasted or not), mushrooms, broccoli, artichoke hearts, pumpkin, peppers, herbs, etc. Most just require you to add directly. Some (raw garlic, onions) could benefit by being sautéed a bit first but it is not necessary. A time this could be done is after you remove the chicken, but before you start the gravy (below). All of this can be done in one pan – no washing needed between steps.

The Gravy:
Gravy sounds terrifying but is very, very easy if you follow some basic rules. Short version: add flour to fat and stir over low-medium heat. This is called a roux (pronounced ROO). The longer you cook it, the better it tastes. When the flour is dissolved and you have the color you want, you can add liquid (chicken stock in this case). The most common mistake in making gravy is when people add flour directly to hot liquids. The flour granules grab on to each other rather than get dispersed in sauce. This is why you get lumps. When you do the roux method, you are separating the flour granules before the liquid is added. Hence smooth sauce. After it’s thickened, season with salt and pepper and, if desired, herbs. Note: You can also use leftover refrigerated gravy (think: thanksgiving)

The Crust:
Endless options here, too. You can use pre-made puff pastry, refrigerated pre-made pie dough, can of cheap biscuit dough, bisquick mix, even mashed potatoes or cornbread. The topping doesn’t really matter and the choice is yours. I rarely think to pick up any of these ingredients so I just make my own. Here is a recipe that can be made in less than five minutes from easy to have-on-hand ingredients.
Basic Pie Dough (adapted from the Joy of Cooking)
1 cup all-purpose flour
½ teaspoon salt
7 tablespoons butter

Mix all together until it has the grain of cornmeal. When mixed, add 4 Tablespoons of water. Blend lightly into dough until it just holds together (NOTE: the longer you mix flour and water together, the tougher your dough will be. That is why you mix fat/flour together FIRST, and add water only at the end and gently.

Assembling the Pot Pie:
This is so easy, I feel ridiculous writing this down but here it goes. Into your vessel(s), dump in the meat and/or veggies. Pour in enough gravy to cover. Top with pie crust (you can roll it out or just pinch it off and layer on top. If you roll it, make sure you prick it to allow steam to escape. Optional touch: You can make fun designs out of a rolled crust using cookie cutters). Put the assembled pot pies on a baking sheet (so if they drip, they won’t make a mess). Bake 30-40 minutes at 425 degrees. You want the crust to be crisp and the inside filling to be hot. By and large, if it looks done it probably is. Optional touch: beat and egg and brush it on the top of the crust before baking. It will make the crust shiny. If you don’t have something to brush it with, use a paper towel or napkin. Even your clean fingers would work.

Summary:
Hardware needed: Bowls or some other type of vessel to cook the pot pie in, Pan to cook chicken, cookie sheet to put assembled pot pies on while baking, whisk is optional for mixing gravy since a fork will work as well, measuring cup (if making own crust).
Ingredients needed: Any amounts of meat/veggies for filling. Flour for gravy and crust, some type of fat for gravy (butter, bacon grease, etc), and butter for crust.
Make-ahead ability: Can totally be assembled ahead, even a day in advance. Cover and refrigerate. Pull from fridge and bake. Another option to consider: a friend of mine makes them in ramekins and then freezes them as individual servings. Easy since you can do all your prep at once and have meals for a long time.
Reheating capability: Reheats well, great for lunch the next day.

Friday, November 17, 2006

Walnut Infusion

With all the walnuts, a friend suggested I make walnut vodka. Apparently it exists in Poland as a digestive aid. Because there was a high chance of it tasting like crap, I only made a little bit. I poured the vodka over some shelled walnuts in a mason jar last weekend. Within a day, the mixture became a light brown. Now a week later, it is a dark brown and the jet fuel taste has been replaced by a subtle walnut flavor. Don't get me wrong though, it still tastes pretty terrible. I'll give it another few days. Seems like an appropriate post-thanksgiving drink. Or the perfect opportunity to pawn off foul nastiness to my unsuspecting loved ones.

Saturday, November 11, 2006

Walnuts

Brian called the other night asking if I wanted a 50 lb sack of walnuts. A ridiculous question since the answer is most obviously 'yes'. When I got back from Wednesday Widow night, there was the burlap sack on the front porch filled with walnuts.


I spent 2 hours shucking on Thursday and ate most that I shucked. I tried again last night and now our kitchen looks like a walnut bomb exploded. Shells everywhere. Kinley and Hughes are very curious but haven't eaten anything that's fallen on the ground. I'm proud of them. I have.

I spent most of last night shucking and I only have about 1/8th of the bag to go. I sat on the living room floor, watching the football game. Kinley got excited and stepped on the bowl of cracked walnuts, sending them flying across the room. I screamed like a banshee, which scared the bejeezus out of him. He hasn't come near the walnuts since.

You'd think a 50 lb sack of walnuts would produce lots and lots of walnuts. But that would be a vicious lie. All of my work last night produced just 10 cups of walnuts. 8 cups of which I gave to Marne for her to make a walnut pie. The rest I'm keeping and freezing. If I don't eat them first.

Pictures for my mom and Sara

They ask for so little. If they want to see pictures of the guest room and dining room rug, they get it.

Pictures of the new dining room rug. I was having a hard time with the blue but now I'm getting used to it:


New paint job in the guest room:


Thursday, November 09, 2006

In the Spirit of Food and Cooking

The cooking class post got quite the response and got me thinking of some of my favorite dishes to make and eat. However, many of those dishes couldn't be made (or at least as easily) without some of my favorite kitchen hardware. So here is my list of favorite kitchen gadgets and tools. And I'm not talking basic chef knife or cutting board. That goes without saying.

1. Food processor: My number one. I use this for my enchilada fillings, dehydrated tomatoes for sauce, pastry doughs, making peanut butter, bread crumbs. I would be a different cook without it (read: messy and tired).
2. Immersion blender: A strange choice for number 2 perhaps, but this and my food processor go hand in hand. Especially in the winter. Making a butternut squash soup? I reach for this. Tomato sauce too chunky? I reach for this. I broke our blender last summer and realized I don't really miss it. Between food processor and an immersion blender, I can blend pretty much everything.
3. Digital Thermometer with External Read: If you are interested in roasting a chicken/turkey that stays juicy without much work, this is your golden ticket. Insert the probe into the bird, let the wire hang out of the oven and connect it to the external display. Set the buzzer to go off when the internal temperature hits your desired temperature. No poking around. No wondering when. It also has a timer, so set the buzzer based on time or temperature. (My favorite: roast small chickens to 168 degrees, which gives you juicy breast meat for dinner that night. The dark meat is still a little pink, which I pull off and either cook the next day or freeze. Then I put the carcass in my:
4. Crock Pot: I don't have the time to make stock on the stove. I don't want to watch it. Stir it. So instead I put the cleaned bird carcass in the crockpot with an onion, celery & bay leaf and cover the thing with water. Cook on low for 12-18 hours while I sleep or am at work. Then I have perfect chicken stock ready to freeze, or preserve in my:
5. Pressure Canner: This thing has changed my life. I no longer have gallons of chicken stock clogging my freezer. It is sitting all pretty on shelves in the basement. Ready to be opened whenever needed with no thawing. And for pennies rather than the $1/can. In addition to the stock, I have soups. Thick gorgeous soups like butternut and potato-leek. I have tomato sauce. Making a quick dinner from previously made food has never been so easy (and sterile).
6. Cast iron skillet: Of all the pans I own, I reach for this one 95% of the time. I sear chicken. I cook eggs. I make quesadillas. Nothing, nothing cooks better than this thing.
7. Electric beater: I don't care if it's a hand beater or a fancy stand mixer, I just want something that will whip cream, egg whites or potatoes. And I don't want to do it by hand.
8. Chinois/China Cap/Restaurant-style Colander: I'm not talking about the big-holed colander we all own. I'm talking about conical-with-a-long-handle-sit-on-a-stockpot-to-strain-everything chinois. Chicken stock, apple pectin, toddy coffee, even pasta. I love this thing. Buy it at a restaurant supply store though since $100 for this is retarded.
9. Food Dehydrator: Nothing takes down a glut of tomatoes quite like a food dehydrator. A giant bowl of tomatoes, sliced and dehydrated on low overnight will produce a half to 3/4-filled sandwich sized baggie of tomato sauce (chopped down in the food processor, see #1 above). Sound like a waste? Taste it and tell me it's not gold. Red gold. Pure concentrated tomato flavor.
10. Mandoline: I rarely use this but when I do, it's worth every penny. Slicing 10 onions super fine takes about 2 minutes. Ditto for when I want to make a potato gratin. Or bread and butter pickles out of cucumbers. The mandolin is my friend. I don't see her that often, but I love that she's always there for me when I need her.

The Guest Room

has been repainted. I despised the green. Hated it. Blecht.

It has taken a while to decide on the color. I wanted a rust. Ken wanted tan. I ended up painting three of the walls a dark warm tan and the last wall (behind the bed) a deep rust-red. Kinley sat in the doorway while I painted and we listened to "fun upbeat music that puts you in a good mood" on the radio. A ridiculous mix of songs, but I was definitely amused. Turns out Kinley is quite the music snob. All the modern remixes with whiney girls singing made him leave the room. However, he would return for Right Said Fred's "I'm too Sexy", Salt n' Pepa's "Whatta Man (Shoop)", and Young MC's "Bust a Move".

Furniture went back in last night. I love the change.

Tuesday, November 07, 2006

Cooking Class

Most of my friends are excellent cooks. They love to cook, talk about it and immerse themselves in all things food. Hell, one of my girlfriends is even about to crochet cupcakes! Bliss. And then we moved.

Our new friends in Portland are not the foodie kind. Foodies definitely exist in Portland, but few of our friends tend to fall into this catagory. We had a ladies dinner on Sunday where the six of us talked about cooking. 3/6 had no idea how to cook. Blasphemy. So I sent out an email today to the group asking if they'd be interested in learning. I get these replies:
Alyson: "Absolutely. Eric will worship you for this."
Marne: "Yes yes yes! I don't cook. I can't cook. If you looked in my refrigerator today: PBR, cheese, soda, condiments, milk (almost expired), tortillas. My pantry: peanut butter, bread, tomato sauce, cereal, can of beans. Yep, that is literally all the food I have. Warning: I might be a disaster."
Alyson: "That is a feast compared to what Eric and I have. No milk, no bread, no eggs. Eric, the antiprincess of rugged didn't want to go to the grocery store on his lunch because it was raining and he didn't want to get wet walking from his car in the parking lot to the store."
Emily: "The only reason Marne's fridge doesn't contain expired milk is because she finally threw out the carton that had expired in August. I would love to learn to cook. Cereal and toast is getting a little boring."

And so the start of the cooking class begins:
Fun! I am excited about this -- you all are some of the most capable ladies I know.

Since we are by no means an organized class, it's up to us to plan it. I love to cook and I love manifestos, so I think that puts us in pretty good shape. How about something like this:

1. We'll decide what we want to make. As with Slapper heliconia (and in honor of election day), democracy wins and group majority picks the dish. I would also like for this to be a recurring event, if people are into it.
2. Once we decide on the dish, I'll find the appropriate recipe and will prepare the manifesto. That way, everyone will have the printed-out details of the night's dish so you can make it again -- including what you'd need to buy at the grocery store, the tools at home you'd need ( i.e. spatula, 9x13 casserole dish, etc), and the detailed instructions on how to make it.
3. I'll pick up the groceries and host. And then we cook... We'll make a mess, learn a lot, drink some wine (or black cherry soda) and eat our dish at the end of the night.

That said, any requests for the first class? Are there any dishes you've been wanting to learn to make?


Looks like chicken cordon bleu has been requested and will be in the line-up. Probably also lasagna and enchiladas. Any other ideas from my foodie friends on what to teach cooking newbies?

Night at the Auction

Our house is mostly set up. We have been here 2 years come Thanksgiving Day. The big stuff is covered. When one first moves into a place, one tends to bring all their old stuff. Unless distance is a factor, it is cheaper to do so. It may not fit perfectly, but it will at least be OK for the time being.

That is where we are now.

We have soft fir floors, a big puppy and a growing group of friends. Something's got to give. And so far it's been our floors, especially around the dining room table. We had a rug under the table to protect the floors; however, the rug was too small for the space (it fit the living room of the little guest house on 2nd street in Tucson, if that tells you anything). Chairs slid back from the table. Floors scratched.

And then we got an email from a friend yesterday telling us about a once-a-year rug auction happening last night. Pennies on the dollar, they said. We went.

The dimensions of our room quickly ruled out many of them. Our dream rug was 8x10, with allowances of 7-9'x9-10'. There were 10 rugs or so within those limits. We had 40 minutes to check them all out before the auction started. So there we were on our hands and knees flying through rugs. We found two we liked. The first was pretty and very well made. We liked it better than the second. Apparently others thought so, too, as it quickly went out of our price range when the auction started. "But I didn't even get to bid on it", said Ken. Oh well. The second was the 230th rug. At 100 rugs auctioned per hour, we knew we were going to be there a while. I had already let go since Ken wasn't as thrilled with it as he was with the first rug. He liked it but the weave wasn't as tight. It wasn't as 'this'. It wasn't as 'that'. I let go of the rug. But then when they held it up at auction, Ken liked it again. We set our price limit well before the auction and were pleased when we won the rug for less than the estimated price. Excited but scared. It has blue in it. More blue than in our whole house combined. We would have to see it in place. Ken also loved and bid on a smaller rug for the foyer, but that went out of our price range and was the final rug of the sale.

We paid, loaded up in the pouring rain and brought our new rug home. Suffice it to say, it looks great and Ken loves it. Phew. Kinley and Hughes both think it smells funny. So do I. Musty, which will go away with time. And so our night at the auction came to an end. Protected floors, curious pets and a semi-content Ken who wished he bid a little extra for that last rug that got away.

Friday, November 03, 2006

Behold, the Power of Cheese

I love to cook but have been perplexed by cheese sauces. Mac and cheese is wonderful and I have wanted to make my own for sometime since the fluorescent processed stuff is tasty but scary.

However, I have been afraid to do so. My aversion to making my own cheese sauce stems mainly from one incident occurring twice:
1. Misch's cheese sauce nightmare. On the houseboat before our wedding, she and Karl made an awesome dinner. The cheese was supposed to be blended in at the end. But it didn't blend and just made a stringy (but tasty) mess.
2. I tried repeating it and ended up with the same stringy mess.
When Brian and Marsha came to visit, we talked about making cheese sauces, beer cheese soup, etc. Sometimes it works, sometimes not. Since I have more food science books than most people should, I looked it up in McGee, the bible of food science. Sure enough, the abitity of cheese sauces to blend properly without breaking are influenced by the following two factors:
1. Heat. Too high of a heat and the sauce will break. Period.
2. The harder the cheese, the better your chance of success. Parmesan/Gruyere is going to blend better than cheddar which would blend better than monterey jack. But again, heat is key.
With this in mind, I made my first cheese sauce last night. 2 tablespoons of butter made into a roux with 2 tablespoons of flour. Cooked until nicely browned. Add a cup of milk and whisk until thick. Kill the heat. When warm but not hot, I added the chedddar/jack combo (95/5) a bit at a time, whisking until smooth. More cheese, more stir. Lo and behold. Perfect. Silky smooth. Season to taste and pour over noodles. And it reheated well today (eating it for lunch now, hence this post).

Feeling quite proud of myself, I talked to the chef at Spice last night about his awesome spicy mac (Spice is the dodgeball sponsor bar, formerly known as Billy Reed's). I asked him how he makes his Spicy Mac and was very excited when he told me: Reduce heavy cream, add 3 tablespoons of cajun seasoning, and then your cheese (80/10/10 blend of mozzarella, swiss and cheddar).

And then he cautioned me to make sure the sauce isn't too hot before adding the cheese else the sauce will break.

Thursday, November 02, 2006

My Grant

was not funded. Not even close. I'll get the comments back as to why in 4-8 weeks. I wasn't expecting it to get funded, but I'm still a bit disappointed.

And the machine that "reads" my cells is broken for a week. Meaning the experiment that's ready to go has to be kept in the freezer. And did I mention it's raining and will be for the next 4-5 days? I think it's time for me to go back to bed.